
Schlage FE595 User Manual: A Comprehensive Guide (Updated 04/07/2026)
Welcome! This manual provides detailed guidance for the Schlage FE595‚ offering support and understanding for your new keyless entry lock system.

Thank you for choosing Schlage; we appreciate your support and trust in our products.
The Schlage FE595 represents a significant advancement in home security‚ offering keyless convenience and robust protection for your property. This electronic keypad lock eliminates the need for traditional keys‚ granting access via a customizable combination code. Designed for easy installation on most standard doors‚ the FE595 seamlessly blends functionality with a sleek‚ modern aesthetic.
This user manual serves as your comprehensive guide to understanding‚ installing‚ programming‚ and maintaining your Schlage FE595 lock. Whether you’re a homeowner seeking enhanced security or simply desire the convenience of keyless entry‚ this manual will equip you with the knowledge to maximize the benefits of your new lock. We’ve included detailed step-by-step instructions‚ troubleshooting tips‚ and important safety information to ensure a smooth and secure experience.
The FE595 is more than just a lock; it’s peace of mind‚ knowing your home is protected by a reliable and innovative security solution. Thank you for selecting Schlage!
Key Features and Benefits

The Schlage FE595 boasts a range of features designed for enhanced security and user convenience. Keyless entry allows for code-based access‚ eliminating the risk of lost or copied keys. Adjustable audio settings provide customizable feedback‚ while the low battery warning ensures you’re never unexpectedly locked out.
Benefit from the easy programming of up to 4 user codes‚ granting access to family members or trusted individuals. The auto-lock function provides added security by automatically locking the door after a set period. Its durable construction resists tampering and withstands harsh weather conditions.
The FE595 offers a significant upgrade to traditional locks‚ providing a modern‚ secure‚ and convenient entry solution. Enjoy the peace of mind that comes with knowing your home is protected by a trusted brand and innovative technology.
Package Contents & Parts Identification
Upon opening your Schlage FE595 package‚ please verify all components are present. The package should include the exterior assembly‚ featuring the keypad and lock cylinder‚ and the interior assembly‚ housing the electronic components and battery compartment.
You’ll also find the bolt and latch components‚ essential for securing the door. Separate hardware includes the strike plate‚ mounting screws‚ and a detailed installation guide. Carefully inspect each part for any damage before proceeding with installation.
Familiarize yourself with the names and functions of each component. Refer to the diagrams within this manual for clear visual identification. Proper identification of parts is crucial for a smooth and successful installation process. Retain all packaging and documentation for future reference.
Exterior Assembly Breakdown
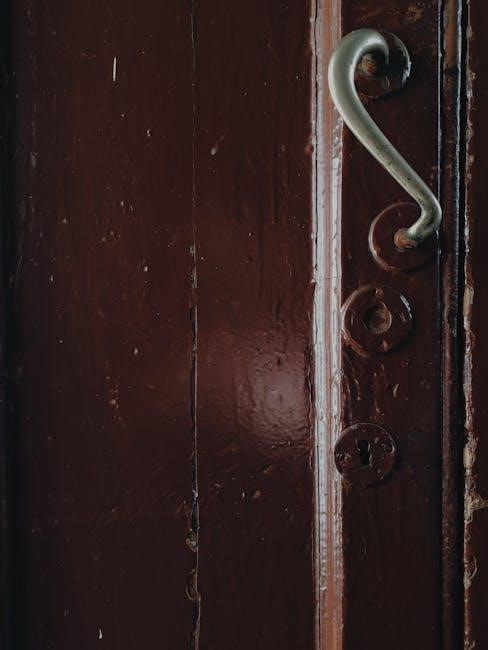
The Schlage FE595 exterior assembly is the visible portion of the lock‚ designed for weather resistance and user interaction. Key components include the robust keypad‚ used for entering access codes‚ and the integrated lock cylinder‚ providing a traditional key override option for emergencies or convenience.
The exterior escutcheon protects the internal mechanisms and provides a clean‚ finished look. A retractor claw manages bolt extension and retraction. The assembly also features a battery cover‚ granting access to the power source.
Carefully examine the alignment of these parts. The keypad buttons should be responsive‚ and the lock cylinder should turn smoothly. Ensure the exterior assembly is free from any visible damage before installation. Proper functioning of these components is vital for the lock’s overall security and usability.
Interior Assembly Breakdown
The Schlage FE595 interior assembly houses the electronic components and controls the locking mechanism. Key parts include the circuit board‚ the ‘brain’ of the lock‚ managing code entry and bolt operation. The drive mechanism translates electronic signals into physical bolt movement. A manual override allows internal operation without a code‚ useful in emergencies.
The interior escutcheon provides a mounting point and aesthetic cover. A battery compartment securely holds the power source. The assembly also includes a connector harness‚ linking the interior and exterior components.
Inspect the circuit board for any damage. Ensure the drive mechanism moves freely. Verify the manual override functions correctly. Proper assembly and functionality of these parts are crucial for reliable operation and security.
Bolt and Latch Components

The Schlage FE595 utilizes a robust bolt and latch system for secure door operation. The deadbolt‚ a solid metal cylinder‚ extends into the strike plate‚ resisting forced entry. The latch retracts into the door edge‚ allowing handle-operated entry. The faceplate provides a clean finish and secures the latch assembly;
The strike plate‚ mounted on the door frame‚ receives the bolt and latch. Correct alignment is vital for smooth operation. A reinforcement plate can enhance security‚ strengthening the frame around the strike plate.
Inspect the bolt for smooth extension and retraction. Ensure the latch engages firmly. Verify the strike plate is securely mounted and aligned. Proper function of these components is essential for reliable locking and unlocking.
Installation Guide: Step-by-Step
Begin by carefully reviewing all instructions before starting. First‚ confirm your door preparation meets Schlage specifications – proper backset and door thickness are crucial. Next‚ install the latch and strike plate‚ ensuring a snug fit and correct alignment.
Then‚ attach the exterior assembly‚ connecting the cable to the interior unit. After that‚ mount the interior assembly‚ securing it with the provided screws. Verify proper bolt and latch operation before proceeding.
Finally‚ test the lock with a trial combination. Double-check all connections and screws for tightness. A correctly installed Schlage FE595 provides enhanced security and convenience. Refer to diagrams for visual guidance throughout the process.

Preparing the Door
Essential door preparation ensures a smooth installation. First‚ verify your door thickness falls within the accepted range – typically 1 3/8 inches to 1 3/4 inches. Next‚ determine the backset; the Schlage FE595 accommodates both 2 3/8-inch and 2 3/4-inch backsets.
Then‚ confirm the door bore hole diameter is 2 1/8 inches. After that‚ check the latch bore hole size‚ which should be 1 inch. If modifications are needed‚ use appropriate tools and exercise caution.
Ensure the door frame is sturdy and capable of supporting the strike plate. Proper door preparation prevents operational issues and maintains the lock’s security features. Carefully follow these steps for optimal results.
Installing the Latch and Strike Plate
Begin by inserting the latch bolt into the latch housing on the door’s edge. Secure it firmly with the provided screws‚ ensuring smooth operation. Next‚ position the strike plate on the door frame‚ aligning it with the latch bolt.
Mark the screw holes and pre-drill pilot holes for easier installation. Then‚ attach the strike plate using the supplied screws. Confirm the latch bolt extends fully into the strike plate opening when the door is closed.
Adjust the strike plate if necessary to achieve a snug fit. Proper alignment is crucial for reliable locking and unlocking. Finally‚ test the latch and strike plate functionality several times to verify correct operation before proceeding.
Installing the Exterior and Interior Assemblies
First‚ connect the cable from the exterior assembly through the door’s hole‚ ensuring it’s not pinched or damaged. Then‚ carefully position the exterior assembly onto the door‚ aligning the mounting plate. Secure it with the provided screws‚ tightening them evenly.
Next‚ insert the interior assembly’s cable connector into the exterior assembly’s port. Align the interior assembly with the mounting plate and gently push it into place. Fasten it using the screws‚ again ensuring even tightening.
Verify that both assemblies are securely attached and that the keypad functions correctly. Test the locking and unlocking mechanisms to confirm proper operation before finalizing the installation.
Programming the Combination
To begin‚ ensure the lock is unlocked. Press and hold the ‘Program’ button on the interior assembly until a red light illuminates‚ indicating programming mode. Enter your desired four-to-eight-digit combination code.

Confirm the code by pressing the ‘Program’ button again; a green light signifies successful entry. Test the new combination by attempting to unlock the door. Repeat the process if necessary to ensure accuracy.
Remember to keep your combination code confidential. Avoid easily guessable numbers like birthdays or addresses. Consider changing the code periodically for enhanced security. The lock will automatically save the new combination after confirmation.
Changing the Combination Code
To alter your existing combination‚ start by entering the current‚ valid code to unlock the door. Then‚ press and hold the ‘Program’ button located on the interior assembly until the red indicator light activates‚ signaling programming mode.
Next‚ input your new‚ desired four-to-eight-digit combination. Confirm the new code by pressing the ‘Program’ button once more; a green light will confirm successful programming. Always test the new code immediately to verify functionality.
For security‚ choose a code that isn’t easily predictable. Regularly updating your combination is recommended. If you forget your code‚ refer to the troubleshooting section for reset instructions. The lock automatically stores the updated code upon confirmation.
Troubleshooting Common Issues
Experiencing difficulties? Incorrect combination entry is common; ensure accurate input‚ remembering the code is case-sensitive. If the lock fails to respond‚ check the battery. A low battery indicator (flashing red light) signals the need for replacement.
For unresponsive locks‚ verify the interior assembly is correctly aligned and the battery is fresh. If the bolt struggles to extend or retract‚ ensure the door and frame alignment are correct. Avoid forcing the mechanism.
Should programming fail‚ repeat the process carefully‚ ensuring the ‘Program’ button is pressed at the correct times. Consult the battery information section for compatible battery types. If issues persist‚ contact Schlage customer support for assistance.
Incorrect Combination Entry
Frequent incorrect combination attempts will temporarily disable the lock for security reasons. The system features a lockout period after several failed entries‚ preventing unauthorized access. Wait approximately 10-20 minutes before attempting to enter the code again.
Ensure you are entering the correct code‚ paying attention to the order of numbers. Remember that the combination is case-sensitive if alphanumeric codes are used. Double-check for accidental mispresses or lingering key presses.

If you’ve forgotten your code‚ refer to the ‘Changing the Combination Code’ section for reset instructions. Avoid repeatedly guessing the code‚ as this will prolong the lockout duration. Contact Schlage customer support if you require further assistance with code recovery.
Battery Replacement & Low Battery Indicator
The Schlage FE595 utilizes standard AA batteries to power its functions. A low battery indicator will illuminate red on the keypad when battery power is dwindling‚ typically providing around 30 days’ notice. Replace all batteries at once with fresh AA batteries for optimal performance.
To replace‚ remove the interior assembly‚ locate the battery compartment‚ and remove the old batteries. Insert new batteries‚ ensuring correct polarity (+/-). The system may briefly display “Low Battery” during replacement‚ which will clear upon successful installation.
Avoid mixing old and new batteries. Using rechargeable batteries is not recommended as they may not provide sufficient voltage. Regular battery checks are crucial to prevent unexpected lockouts. Keep a spare set of batteries readily available.
Battery Information & Specifications
The Schlage FE595 lock is powered by four (4) AA alkaline batteries; We recommend using high-quality alkaline batteries for extended life and reliable performance in varying temperatures. Battery life typically ranges from 6 to 12 months‚ depending on usage frequency and environmental conditions.
Recommended battery types include Duracell and Energizer alkaline AA batteries. Avoid using heavy-duty or carbon-zinc batteries‚ as they may not provide sufficient power. Lithium batteries are not recommended due to potential voltage inconsistencies. The lock operates optimally within a voltage range of 6.0V to 7.5V.
Ensure correct battery polarity during installation (+/-). Do not mix old and new batteries. Always replace all four batteries simultaneously to maintain consistent power. Low battery warnings will appear approximately 30 days before complete depletion.
Care and Maintenance
To ensure the longevity and optimal performance of your Schlage FE595 lock‚ regular care and maintenance are recommended. Avoid using abrasive cleaners or solvents‚ as these can damage the finish. Instead‚ clean the exterior surfaces with a damp cloth and mild soap.
Periodically inspect the bolt and latch components for smooth operation. Lubricate these parts with a silicone-based lubricant if necessary‚ avoiding oil-based products that can attract dust and debris. Check the strike plate alignment regularly to ensure proper door closure.
Avoid exposing the lock to extreme temperatures or moisture. If the lock is exposed to rain or snow‚ wipe it dry immediately. Do not attempt to disassemble the lock beyond the battery replacement procedure. Proper maintenance will help maintain security and reliability.
FCC Compliance Information
This device complies with Part 15 of the FCC Rules. Operation is subject to the following two conditions: (1) This device may not cause harmful interference‚ and (2) this device must accept any interference received‚ including interference that may cause undesired operation.

Changes or modifications not expressly approved by Schlage could void the user’s authority to operate the equipment. This equipment has been tested and found to comply with the limits for a Class B digital device‚ pursuant to Part 15 of the FCC Rules.
These limits are designed to provide reasonable protection against harmful interference in a residential installation. The manufacturer is not responsible for any interference caused by unauthorized modifications or changes.
Warranty Information
Schlage warrants this product to be free from defects in materials and workmanship for a period of three (3) years from the date of purchase. This warranty applies only to the original purchaser and does not extend to any subsequent owner or user.
This warranty is void if the product has been subjected to misuse‚ abuse‚ accident‚ or improper installation. Schlage’s obligation under this warranty is limited to the repair or replacement‚ at Schlage’s option‚ of any defective product.
To obtain warranty service‚ please contact Schlage customer support with proof of purchase. This warranty does not cover labor costs for removal or re-installation. Schlage makes no implied warranties‚ including any implied warranty of merchantability or fitness for a particular purpose.
Frequently Asked Questions (FAQ)
Q: What if I forget my combination code? A: You’ll need the original installation key to reset the system. Refer to the “Changing the Combination Code” section for detailed instructions.
Q: My lock seems to be malfunctioning. What should I do? A: First‚ try replacing the batteries with fresh ones. If the issue persists‚ consult the “Troubleshooting Common Issues” section or contact Schlage customer support.
Q: Can I use this lock with a smart home system? A: The Schlage FE595 is a standalone lock and does not directly integrate with smart home platforms.
Q: How often should I replace the batteries? A: Battery life depends on usage‚ but typically lasts 6-12 months. The low battery indicator will alert you when replacement is needed.